Best Smart Blinds Compatible with Alexa & Google Home in UAE
The demand for smart home automation in the UAE is rising for energy efficiency, security, and a luxurious lifestyle. Smart blinds add comfort, convenience, and a stylish look to your…

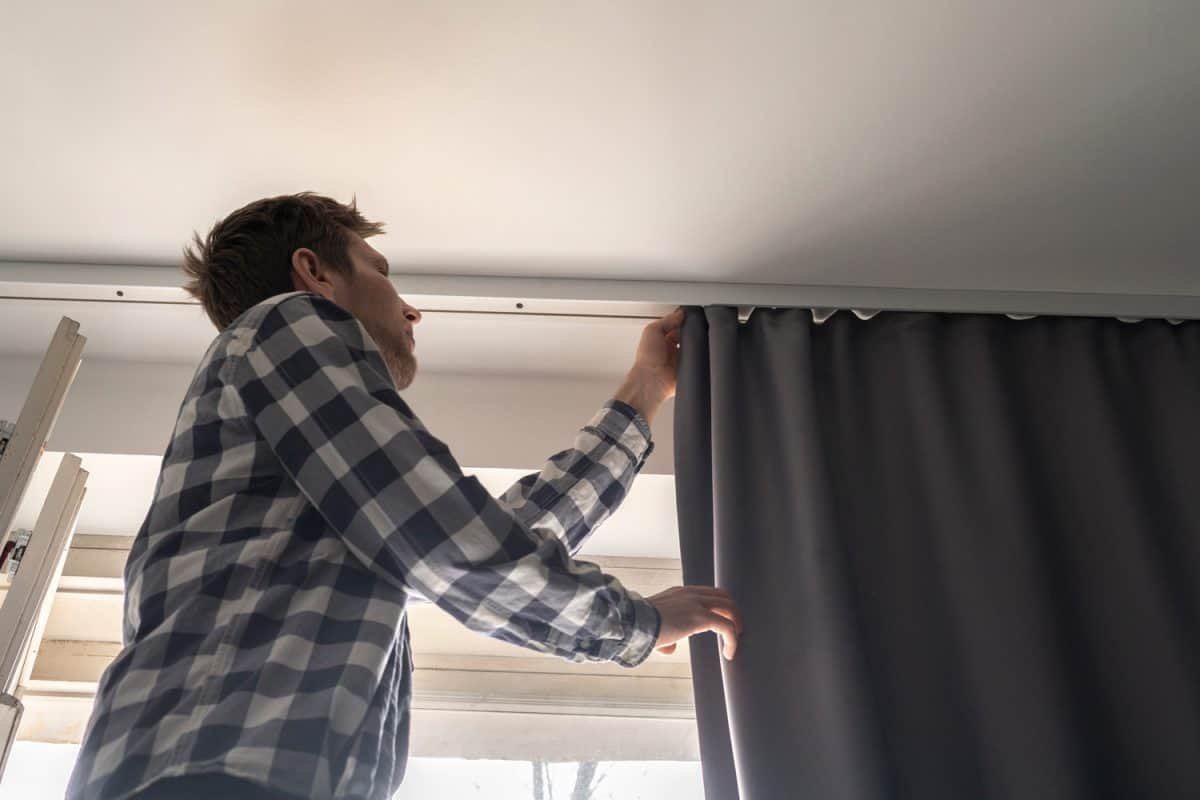
Do you want your small space to look grand and impressive? Now you can achieve it by hanging window curtains from the ceiling to the floor. With this style, you can create an illusion of height, allowing your room to look taller and more stylish. The ceiling-mounted curtains can be used as a divider in the room to separate different spaces without the need for fixed walls.
Further, these drapes provide full coverage of walls, adding privacy in interiors. You can hang these full-length curtains in various styles and fabrics to add a modern aesthetic and functionality.

Before moving on to the installation, gather all required tools to ensure a smooth process. Make sure you have the following instruments:

As we discussed earlier, you can transform the whole look and feel of your space by hanging the sheer curtains from the ceiling. They can upgrade both the style and performance of your interiors. However, all this can be possible if your ceiling-mounted curtains are installed correctly. For your convenience, we have simplified the entire process into these straightforward steps.

Begin your installation by carefully measuring the ceiling height and the window width. For accurate measurement, use a metal measuring tape.
First, measure the ceiling-to-floor height. This step is essential to determine the exact length of your silk curtain. Place your metal tape straight from the ceiling to the floor and note the measurement. Take multiple measurements from different positions in case your floor is uneven. For the perfect curtain length, use the longest measurement.
For a stylish and elegant appearance, your ceiling-mounted curtain should touch the floor. So, measure an extra 2 to 3 inches, or add 3 to 5 cm to the total estimated distance. However, if you want your curtains to pool on the floor for a more luxurious look, then add an extra 4 to 6 inches to the estimated measurement.
Now measure the width of the window frame. This step will determine the width of the ceiling track or rod. Start measuring the window frame from one corner to the other. For full coverage and a more refined appearance, measure 6 to 8 inches extra on both sides of the window frame. If you already have a track or rod, measure its total length with a tape measure. Take measurements carefully from one corner to the other, excluding the rod’s finials.

After measuring the space, it’s time to mark drill points for your track and bracket placement. This step is essential for the straight and secure positioning of your curtain track or rod. First, decide how far from the ceiling you want to attach your hardware. An ideal distance for ceiling-mounted curtain hardware is 5 to 10 cm away from the wall or ceiling. Remember, if you want to create the illusion of height with your ceiling-mounted curtain, hang it as close to the ceiling as possible. Just leave enough space for the rod and bracket to prevent the curtain from getting stuck to the ceiling while gliding.
For marking the location for bracket placement, hold the track or rod straight above the window frame. Take help from a second person to hold the track and prevent bending. Mark both endpoints using a pencil or a marker. Keep in mind, your left and right drill points should be at the same height. You can cross-check it with a laser level or a spirit level.
If your ceiling track is very long, then draw a straight line with a pencil from one end to the other. Then mark all the bracket points on that reference line. For a long track, you need 3 to 4 brackets at 50 to 60 cm apart for a more stable installation. Mark all brackets at a similar distance. If you are using heavyweight blackout fabric, then place brackets at a close distance. After finishing, take a step back and ensure all the marks are at the perfect height and distance. You can also use support beams or ceiling joists for a more secure installation.

Now it’s time to use your drill machine. Drill the holes in the ceiling at the marked points. Select your drill bit and anchors according to the ceiling material. Use strong toggle bolts for drywall. If your ceiling is made of concrete or cement, then use masonry anchors or wall plugs. However, you can use screws directly for a wooden beam.
Now, insert anchors and attach the bracket with the help of screws. Use a screwdriver to tighten the brackets properly to the ceiling. If you are using a ceiling track, slide it into the brackets and lock it with screws. After installation, check the stability by pulling the track or bracket with your hand. Similarly, place the curtain rod on the attached brackets and check the alignment properly.

For an elegant look and a neat hang of your bedroom curtain, remove any wrinkles or folds. Steam the curtain as directed by the manufacturer’s care instructions. Then prepare your curtain depending on its style and header type. If you are using pencil pleat or pinch pleat curtains, insert the drapery hooks or pins into the header tape. However, you can use eyelet curtains that come with pre-inserted metal rings and don’t require any extra effort.
After preparing the curtain, start hanging the panels one by one. If you are hanging a curtain on a rod, attach a finial to one end first. This will secure rings from sliding off. However, if you are using a track system, slide all the gliders onto the track from one end. Then attach the curtain panel to rings, hooks, or gliders from outside to inward direction. Hang all the panels with a similar process.

After hanging, take a step back and check the length of your floor-to-ceiling curtain. Make sure your curtain slightly touches the floor, floats, or pools on the surface. Its full-length drop should be even or adequately aligned. If you see any left or right inclination of the panel, adjust it. Smooth the edges with your hands to create a natural fall. Make sure that the folds or pleats of your pinch pleat curtains are evenly set. With uneven folds, your curtain will appear messy.
After checking the appearance, test the functionality of your curtain. Open or close it several times to ensure smooth movement. In case of snagging, reposition the glider. Align the central opening of your double panels in a straight line. At last, give a final visual check of your curtain fall, track alignment, and panel spacing.

A stylish, clean hanging of a ceiling-mounted curtain is not defined solely by the proper installation technique. Finishing touches also have significant importance. Here are a few tips to give your full-length curtain an elegant, polished look.
The length of your ceiling-mounted blackout curtain can make or break its whole look. A full-length drop, slightly kissing the ground, always appears more aesthetic. Short length with a ceiling mount will look awkward. For a modern, stylish look in living rooms, choose a length that just touches the floor. To achieve a practical and professional look with office curtains, go with a floating length (½ inch above the floor). However, pooling length (2 to 6 inches down the floor) offers a luxurious appeal in hotels.
Ceiling-mounted drapes are commonly used for large windows. They cover wide openings, which is achieved adequately with multiple panels. With a single panel, waves will appear uneven or messy. For a fuller, refined appearance of fabric, use at least 2 to 3 panels. Moreover, with multiple panels, you will get complete window coverage, providing light control and privacy. It will also offer maximum insulation.
For a seamless look, carefully select the design and color of rods or tracks. For modern interiors, use white, matte black, or neutral shade tracks. However, exposed rods can give a decorative touch to your overall decor. You can also use recessed or ceiling-flush tracks to achieve a sleek, classic look.

Although ceiling-mounted curtains are visually appealing, a minor installation mistake can affect their overall look and performance. Below are some common mistakes to avoid for long-lasting style and functionality.
The most common mistake people make is using the wrong anchor types. Never use anchors that don’t suit your ceiling material. For example, heavy-duty anchors are an ideal choice for drywall. If you use plastic plugs in dry walls, you will end up with a disaster. Using the wrong anchors can cause your track to loosen and break more quickly.
Another mistake many people make during measurement is leaving very little space for bracket placement. As a result, rods or tracks are installed too close to the walls, disrupting the smooth movement of the curtain. Your curtain will also get damaged by rubbing and scratching with room furniture, such as headboards and cabinets. So it is necessary to leave a clearance of 2 to 3 inches.
Avoid using curtains that are too heavy for the rods or brackets. Never hang heavy velvet curtains on lightweight rods. They will not withstand the weight and will sag and bend. Your brackets will also get loose. So it is advised to use a motorized track for heavy-duty drapes.
Hanging curtains from the ceiling seems like a simple hanging technique. But it can actually transform the whole vibe of your interiors. With correct measurement, durable hardware, and the proper technique, you can make any space more stylish, spacious, and beautiful. Whether you are looking for privacy, a modern interior design, or just a way to divide the room for different purposes, a perfectly hung ceiling-mounted curtain can do it all. If you incorporate durable brackets or proper alignment, it can provide lasting style and performance.