Best Smart Blinds Compatible with Alexa & Google Home in UAE
The demand for smart home automation in the UAE is rising for energy efficiency, security, and a luxurious lifestyle. Smart blinds add comfort, convenience, and a stylish look to your…

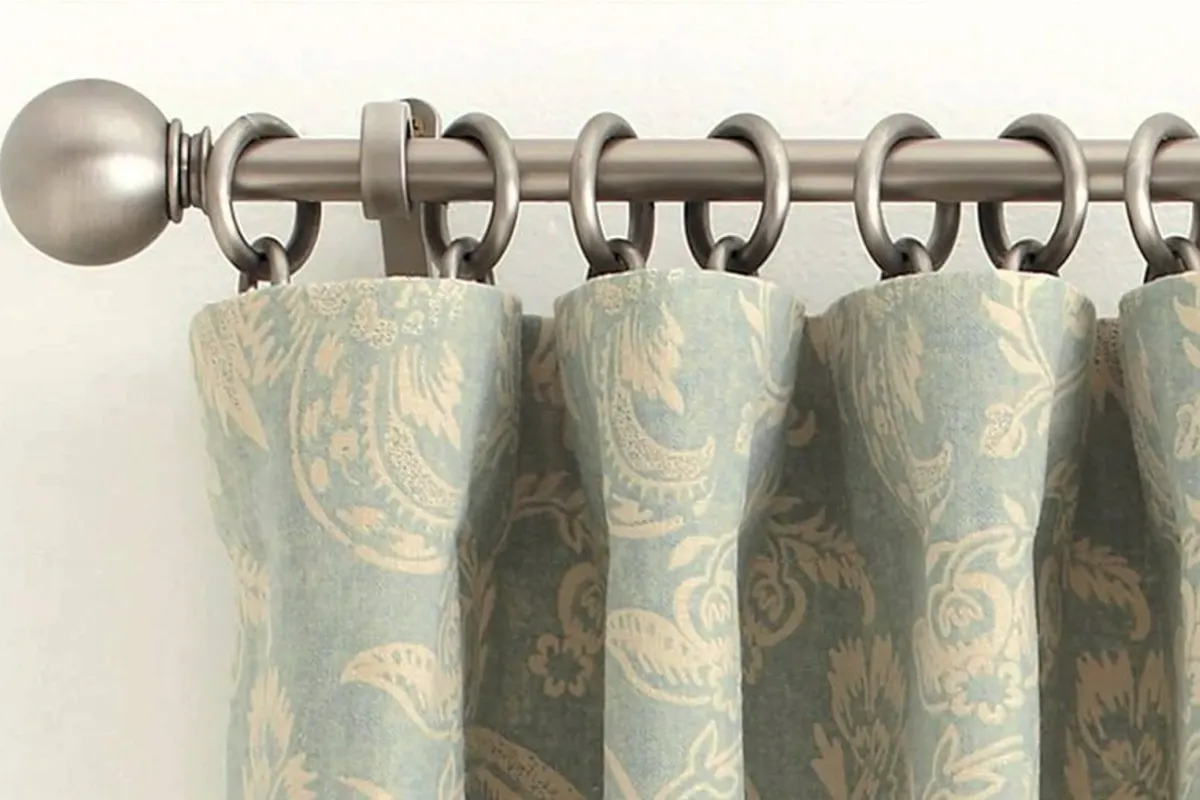
Curtain rings are necessary hardware widely used for hanging drapes. They are chosen for the easy functionality of the curtains. Their circular body allows your window curtains to glide on the rod or track smoothly. These rings are available in different materials, colours, and finishes to complement every decor and practical requirements. They can be attached to clips and hooks to support both lightweight and heavy curtains.
Curtain rings are simple to install and give a sophisticated, modern look. For those hanging curtains with rings, this blog post will let you know about the right steps. This will help you find ways to fix any type of drapes on your window using rings.

Before you start the installation work, the most important task is to collect the useful tools and materials. To ensure a hassle-free task, check the following list.

The first step for hanging sheer window curtains is to upgrade the window dimensions, including width and length. This will help calculate the desired curtain length. To measure the right curtain length, let’s understand the process of measuring the width and height of your window.
Start from one end of your window and take the measuring tape horizontally to the other side. To keep this in mind, write down this measurement to avoid any errors. For the accurate curtain width for this window, multiply the window width or rod width by 1.5 to 3. It means your curtain’s width will be 1.5 to 3 times more than your window width. It depends on your curtain style (pinch pleat, pencil pleat, or rod pocket) and the desired aesthetics.
To measure the window length, start at the top of the rod and measure to the floor. Record this figure on paper. After calculating the window, you need to choose the rod placement. This is necessary to get the right width and length of your curtains. It depends on your desired aesthetic whether you prefer sill-length, apron-length, full-length, or puddle-style drapes. To measure the curtain length, follow these guidelines.
Here are the expert tips you need to know while choosing the right rod placement.

These accurate window measurements will help you determine the right position to install brackets for mounting rods before hanging drapes. Have a look at the steps below, necessary to follow for a secure & perfect installation of the curtain rod.
The first step is to determine the exact position where you need to fix the brackets. The general rule for placing brackets is to keep them 4-10 inches on the side of the window and 6 -12 inches above the window. This may vary depending on your window size and the desired aesthetics.
Mark the position of the first bracket with a pencil. Also, mark the spot for the second bracket on the wall using a level. Place the bracket on the marked positions and indicate the screw position. Repeat the process for the other side of the bracket screws.
After drilling holes, mount the brackets using wall anchors. Make sure the screws are not tightened fully, and the brackets must be straight and at the same height. Use a level for this purpose. Measure the distance from the upper end of the bracket to the roof. If this distance is the same for both sides, it means the brackets are at the same height & your rod is level.
Once you are sure the brackets are level, secure them by tightening the screws. Place the rod on these secured brackets. If the rod is fixed properly and there is no imbalance on either side of the bracket, it means the rod is ready to hang your drapes. Inspect all screws of brackets and, if needed, tighten them for a secure fit.
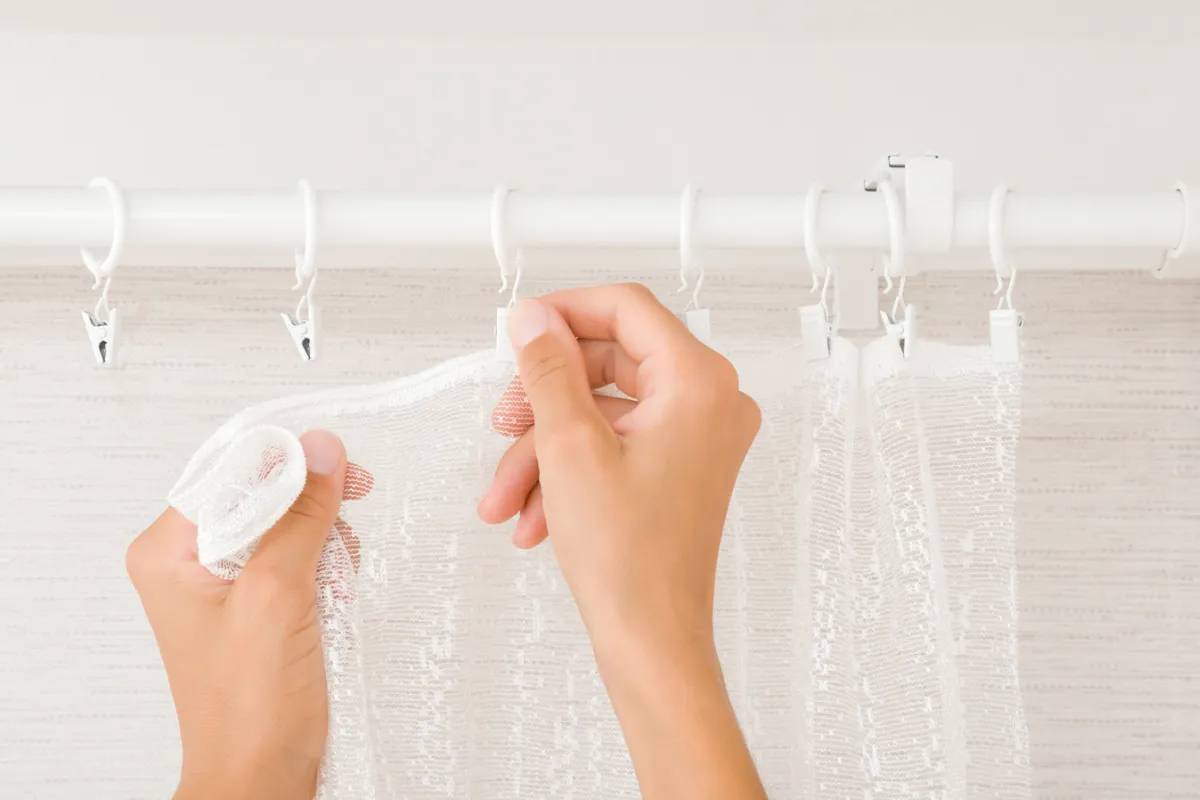
Before hanging curtains on rods, this is the time to attach the rings to your window covering. Here is the guide on attaching curtains by using different types of rings.
For attaching curtains to clip-on rings, lay the curtain with its heading side facing you. Attach a clip to both ends separately. Then fold the curtain into exactly half and clip its centre. By repeating the same procedure, make the curtain fold by folding the remaining curtain part to its exact half lengthwise and attaching the clip to the centre. Do not stop folding and clipping the curtain at every centre until the entire panel is covered and you have neat and even folds.
For attaching pin-on hooks for pleated and heavy curtains, first select the right pins. For heavy curtains, you must select durable and high-performing rings for good support and visual balance. For attaching rings to pleated drapes, insert one pin into each pleat. On the back of the curtain heading, there are seams on the pleats. A good way is to insert each pin correctly into the seam of each pleat.
To check the right place for inserting the hook pin, you need to hold the ring on the back side of the curtain heading. By keeping the lower end of the ring on the upper end of your drape heading, mark the right position for the hook-pin attachment. This will ensure a uniform and accurate hook attachment.
To avoid bunching or sagging of your curtains, the rings should be properly spaced. They will create a neat and sophisticated look with even and neat folds.

When all the rings are attached, the next step is to hang the curtains on the rods. If you care for the following points, your drapes will enhance the visual flow, giving a professional look.
After ensuring the proper spacing of rings and their correct attachment to the curtain panels, slide the rings on the rods. For this purpose, slightly loosen the screws that hold the rods. This way, the rod will be open from one end. Mount each ring onto the rod by using the open end. After you have finished the last ring, place the rod again and tighten the screws.
Once the rod is installed and secure, adjust the fabric for even folds. Space the rings evenly on the rod to make the appearance of pleated curtains aesthetically pleasing. Start adjusting the curtain fabric with your hands to make the folds. It will be simple to create folds of equal height and depth, depending on the fullness required.
To achieve permanent, even folds, set them with your hands. Hold the curtain folds in your fingers and move from top to bottom. Repeat this process, using pins to hold the fabric in place for 1 day or more. This will help you make folds that will last.

To improve the functionality and aesthetics of the curtains, some adjustments are crucial. Read on to the following details, helping you give the final touch with ease.
Once the curtains are mounted on the rods, inspect them for any uneven surface or wrinkles.
You can use the steamer or wrinkle-release spray to make them straight and flat while they are hanging.
See whether you have installed the curtains according to the desired length & width (fullness). If they are not, prefer to set them first. Check the length at three different areas in the centre, right, and left corners. To keep the full-length curtain just above the floor, measure the curtains and take the lowest measurement to avoid dragging over the floor. Similarly, for the puddling effect, take the average of three measurements.
To achieve permanent and even folds, set them with your hands physically. Hold the curtain folds in your fingers and move from top to bottom. Repeat this process, using pins to hold the fabric in place for 1 day or more. This will help you make folds that will last.

For a complete & professional look, follow these expert tips.
While hanging curtains, some common mistakes may arise. They ruin the overall aesthetics of your space. Let’s have a look at those mistakes.
At the end, you might get complete guidance on hanging curtains with rings. Properly hung curtains not only enhance the visual interest but also provide better insulation, light control, and noise reduction. Make sure the curtains are the right length and have accurate fullness. To achieve this, be attentive while choosing the rings. Carefully space the rings on wide panel heavy drapes for better support and balanced aesthetics. Whatever the type of your curtains, follow these steps for hanging curtains with rings for a sophisticated, professional finish.